- 1.What is the interactive syllabus for?
It is a course scenario – a signpost from which students enter the individual e-learning activities. The syllabus is usually structured by time or topic. The teacher prepares the activities one by one and then publishes them to the students in a coherent form.
Homepage of the interactive syllabus in normal view:
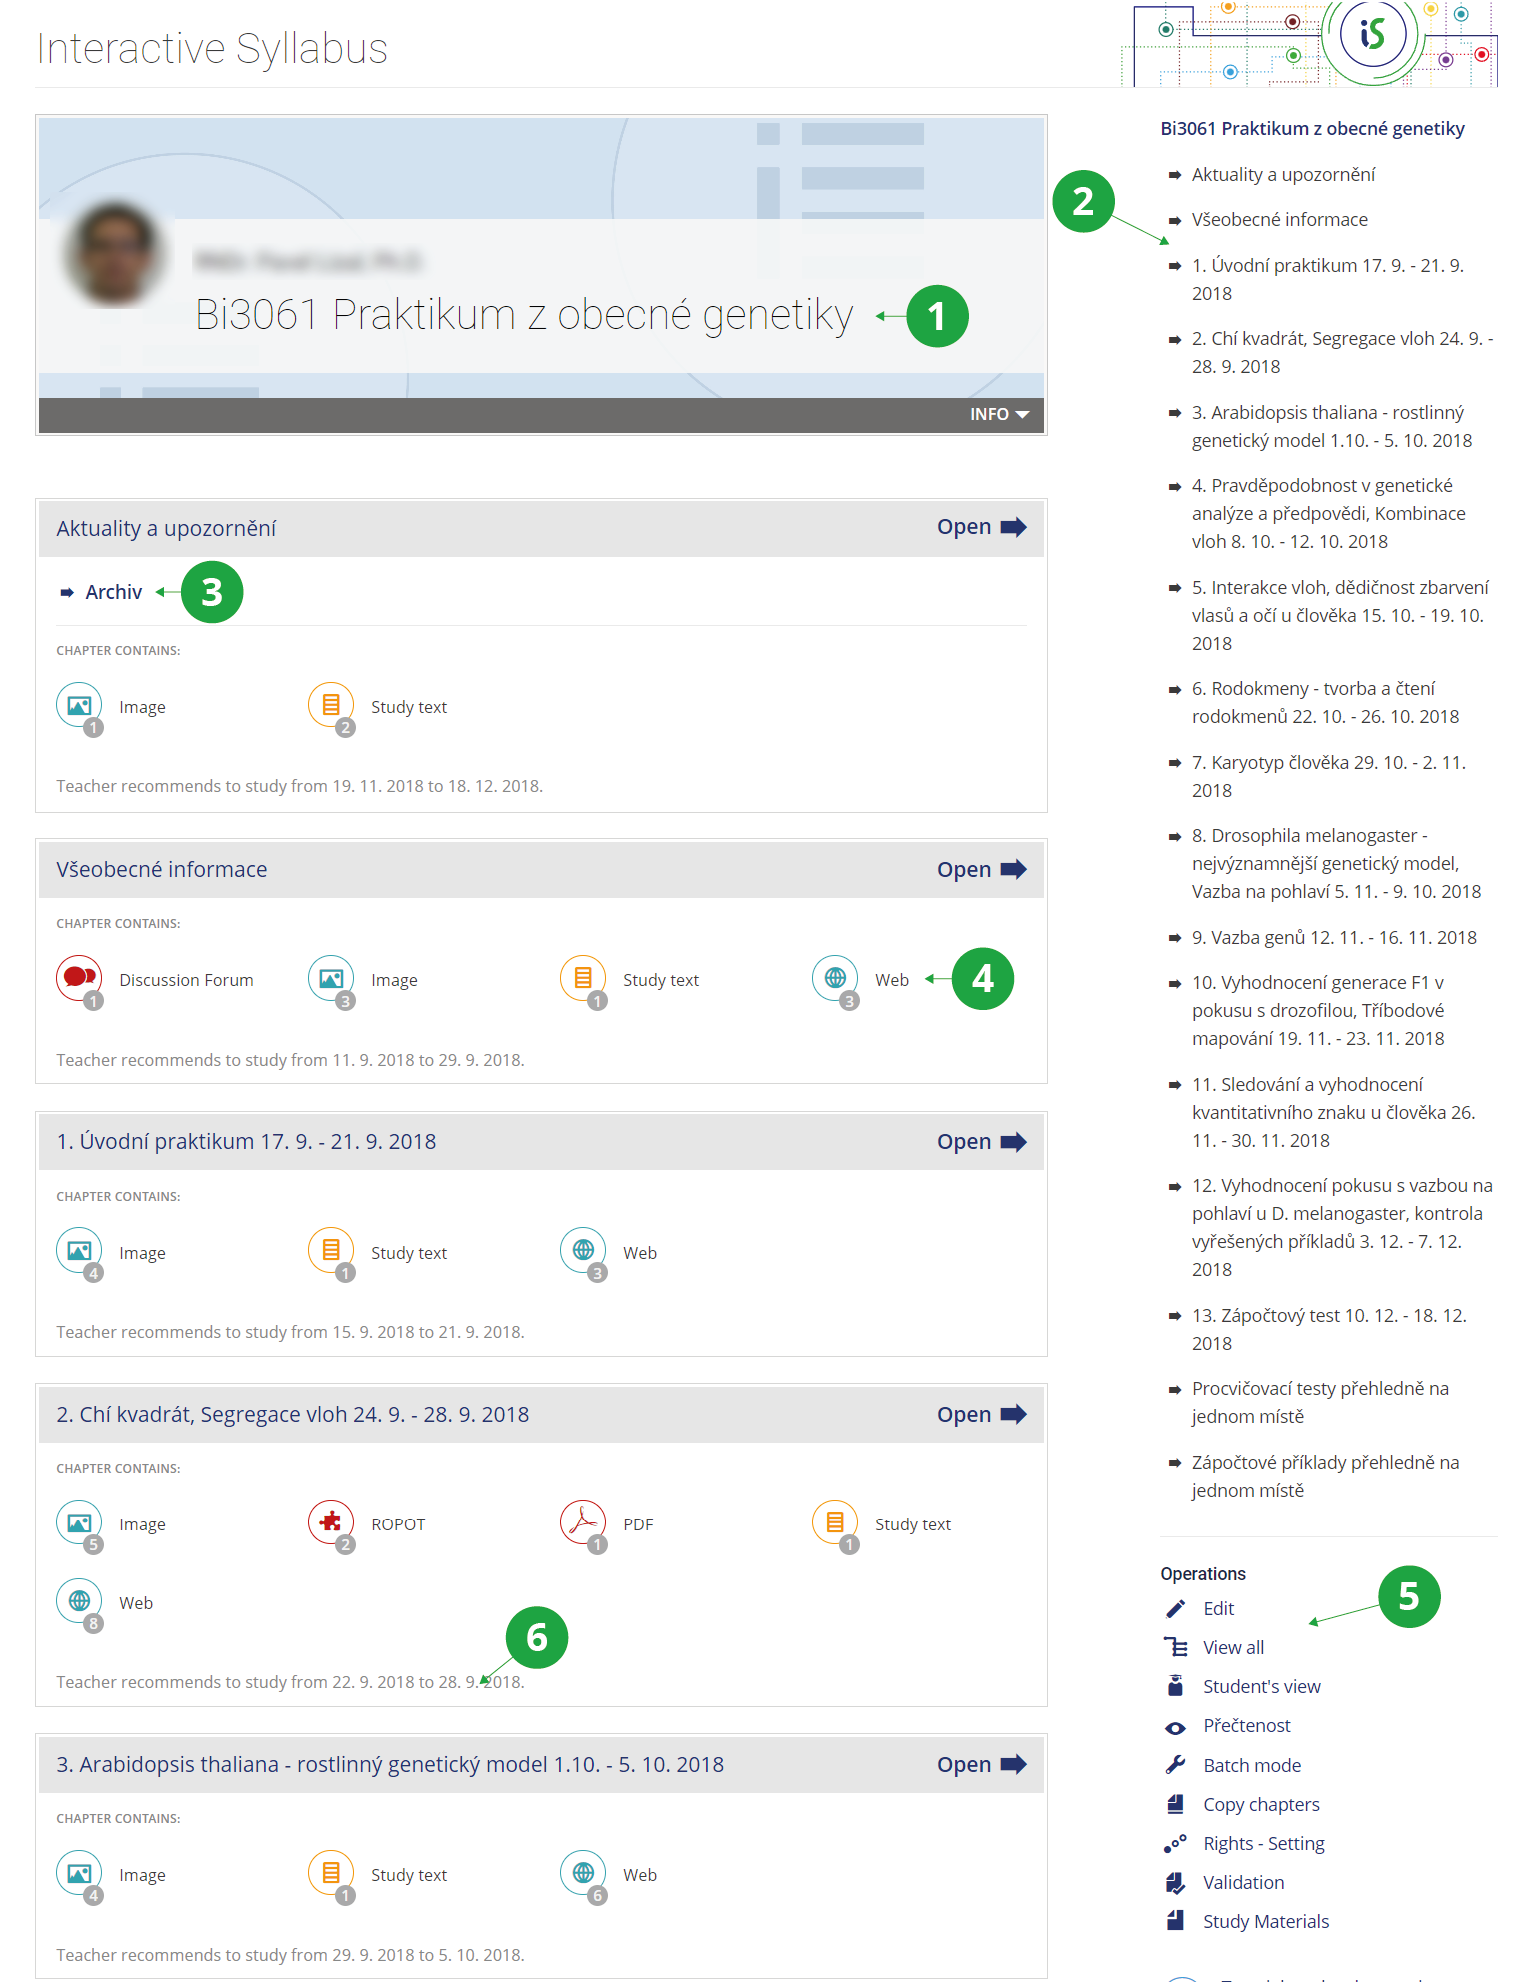
1 Name of the interactive syllabus.
2 Navigating the syllabus.
3 Further breakdown of the chapter.
4 List of activities within the chapter.
5 Editing and other operations with the syllabus.
6 When the teacher recommends studying.
The teacher can fill and edit the syllabus in the editing mode (option "Edit" in the menu of operations for the selected syllabus). Viewing the syllabus in editing mode:
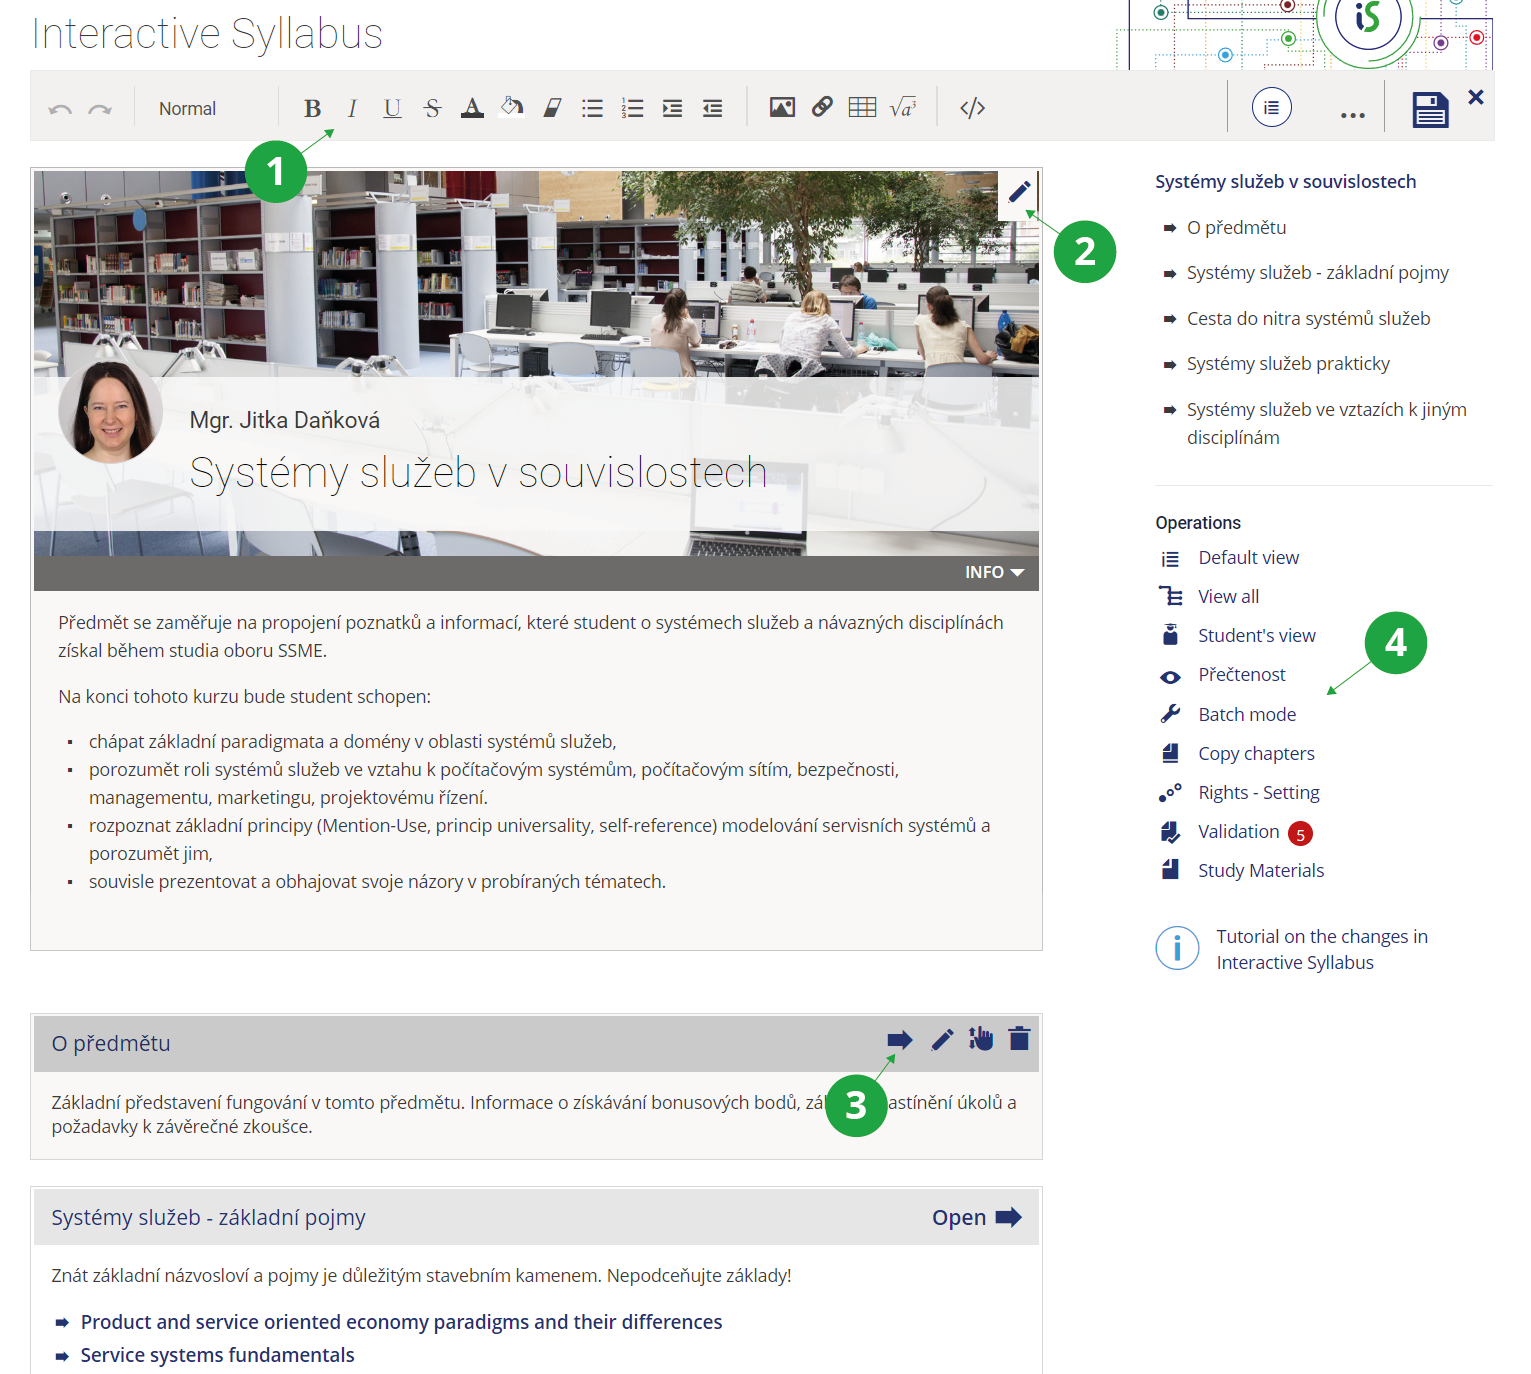
1 When editing mode is turned on, the edit bar appears.
2 Modification of the title of the syllabus, introductory picture and introductory text.
3 Chapter settings.
4 Syllabus operations.
- 2.Is the creation of an interactive syllabus compulsory?
It's not. It is possible to use only part of the e-learning (e.g. practice using ROPOTs, homework vault, discussion forum). It is not necessary to create a syllabus for the small number of activities during the semester. But once students have many learning materials and more learning activities, structuring a course using an interactive syllabus becomes more straightforward for them.
- 3.Starting to work with the interactive syllabus
To create a syllabus, use
The Information system Teacher [course] Interactive syllabi Create a new interactive syllabusYou can then set who the syllabus is intended for, its title and how many main chapters you wish to divide the syllabus into. It is also possible to set a bulk timetable for unpacking individual chapters and publishing them by clicking on "Fill in with a timetable". Once the syllabus has been created, you can start adding content and editing parts of it.
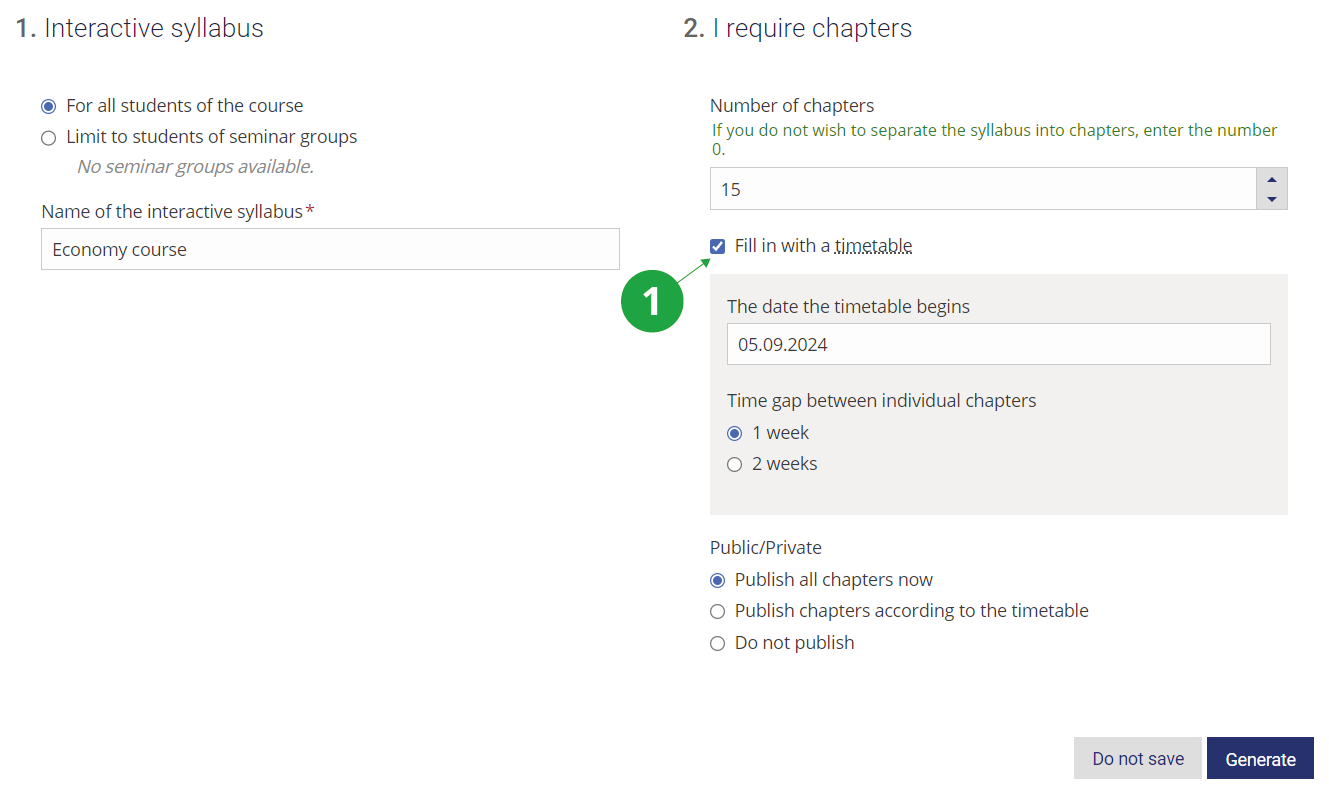
1 Selecting "Fill in with a timetable" when setting up the curriculum.
- 4.I have a syllabus from last year, how do I update it?
For copying the interactive syllabus, as well as other materials in the course, there is an application for copying study materials:
The Information system Teacher [course] Sharing and copying study materials Copy Study Materialsin the ROPOTs and interactive syllabi for the target semester. If the syllabus still needs to be modified (dates, chapter titles), this can be done in the "Batch mode" application. This allows you to bulk move dates in chapters, set locking/publishing and change chapter titles.
If you need to copy the content of one interactive syllabus to another, you can use the "Copy chapters" tool. The tool can be accessed by following the path:
The Information System Teacher [selected course] Interactive syllabi cogwheel on interactive syllabus Copy chapters - 5.Editing interactive syllabus
You can edit the syllabus by:
The Information system Teacher [course] Interactive syllabi [interactive syllabus] editTo insert elements into a chapter, you need to first open the chapter (by clicking on the title or the entire chapter title bar, or the "Open" arrow).
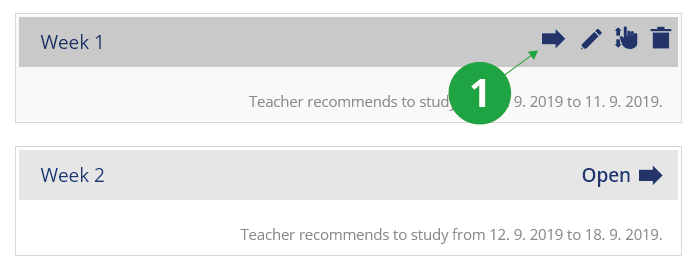
1 When you hover over a chapter, the option icons appear: open the chapter, edit chapter settings, move the chapter, or delete the chapter.

1 Editing bar with elements that can be inserted into the syllabus chapter.
Multimedia, PDF files, images can just be dragged from the computer to the chapter syllabus area. The system will recognize which file it is. It will display the images and prepare some audio and video formats for playback. Individual elements can be deleted using the waste container icon next to the embedded element.
1 You can drag and drop multiple files from your own device into a syllabus chapter.
More details about inserting individual elements:
- Inserting a new chapter: a new chapter can be inserted into the syllabus and other chapters (the number of levels is limited to five sublevels). When inserting, you also set the publication options.
- Text insertion: the text is entered into the syllabus chapter directly in the space that is visible. Basic text color, italics or bolding, indentation can be set using the edit bar.
- Discussion forum: the syllabus can include a link to the discussion forum of (any) course or directly to a specific discussion thread. You can find the thread number in the address bar of the discussions:
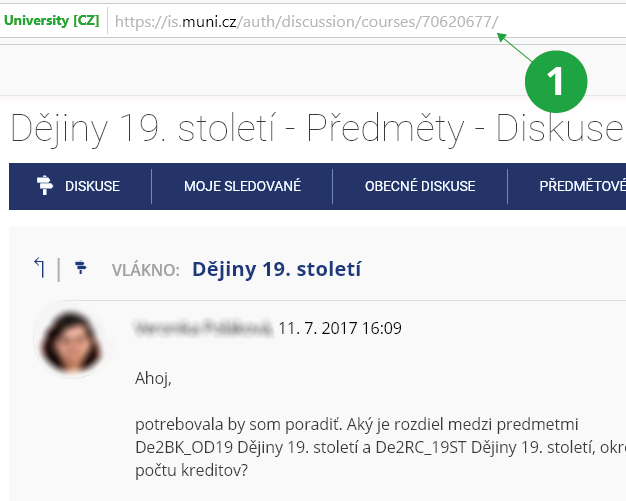
1 Thread number.
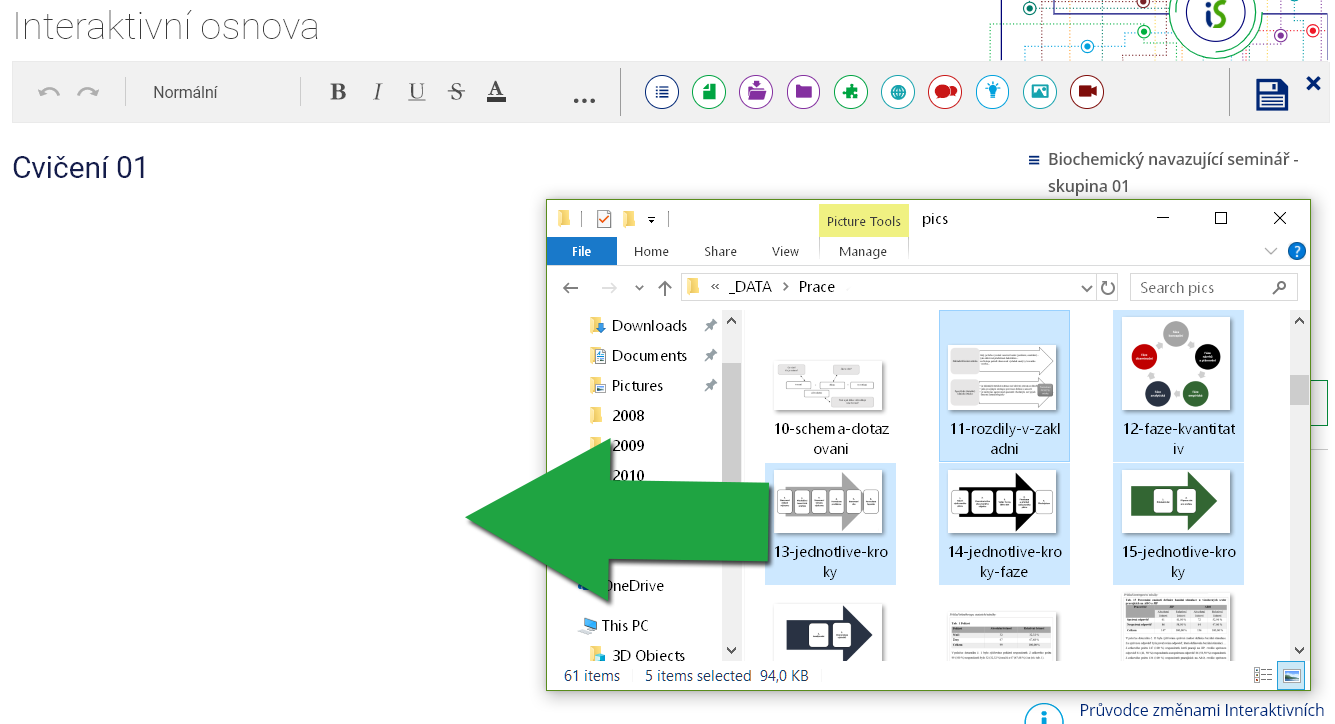
- Study materials: you can upload files from your computer (by dragging or searching) or files stored in the Information System (search for them via the File Manager).
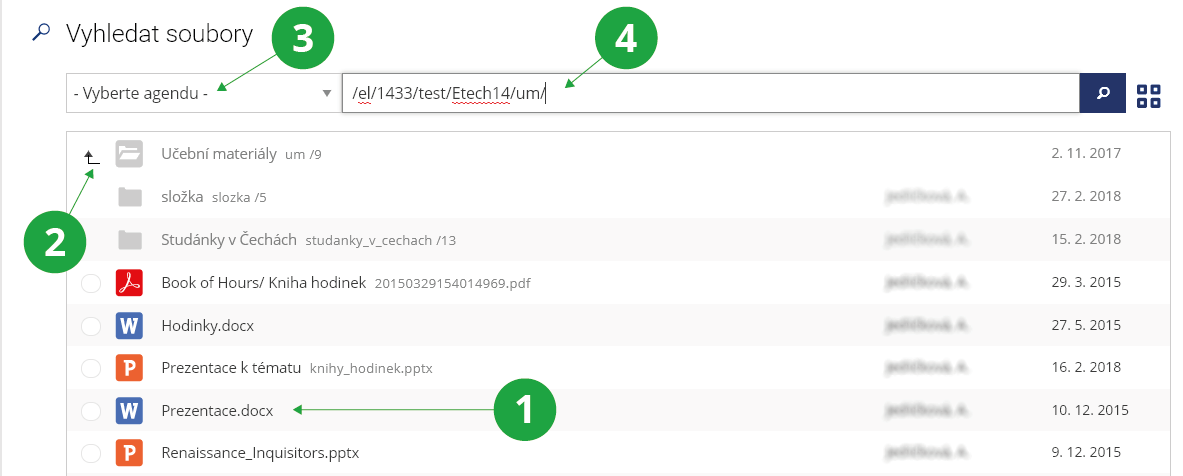
1 An item that can be inserted into the interactive syllabus.
2 Link to the higher levels of the file manager.
3 Option to select a different file manager agenda.
4 Address in the IS PCU.
- Inserting video and audio files: files in common formats can be dragged or uploaded from your device to the chapter syllabus, the system will recognize them and automatically convert them to the HTML5 player so that they can be played directly in the browser. At the same time, they will be secured against downloading. More information is available in the Playing videos in the MU IS help. Playing videos in the IS PCU help.
- Inserting PDF documents of presentations for direct viewing: PDF files can be inserted into the syllabus via the "Study Materials" icon in the editing bar or by dragging and dropping from the teacher's device. To view a PDF file directly in the syllabus, select "Edit" for the selected file and set "View" to "Embedded". The embedded PDF file will be browsable but not downloadable.
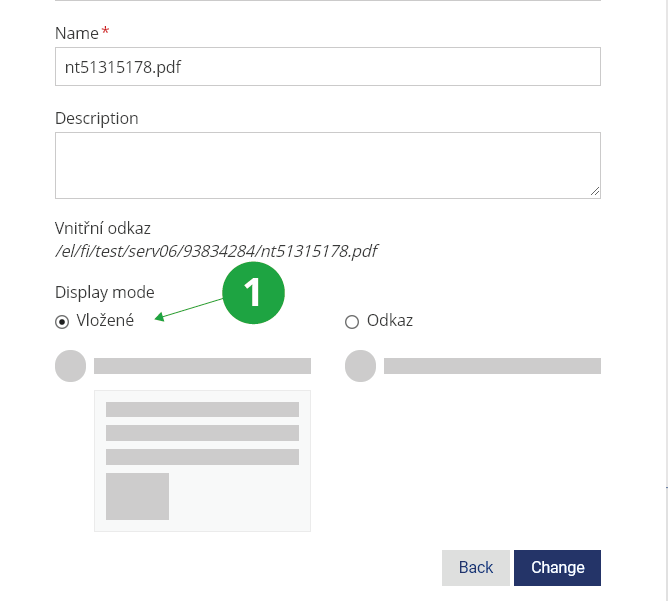
1 For PDF files, you can set the embedded view directly in the interactive syllabus. Students can view the file, not download it.
- Highlighted text: to make the texts inserted into the syllabus clearer, the text can be supplemented with icon boxes that provide students with selected important information, tips or warnings.
- Inserting images: images can just be moved into the syllabus chapter or uploaded from your device, the systém will recognize them, save them in the syllabus and display them.
Moving elements to another place or deleting an element is done using the icon on the top right corner of the element.
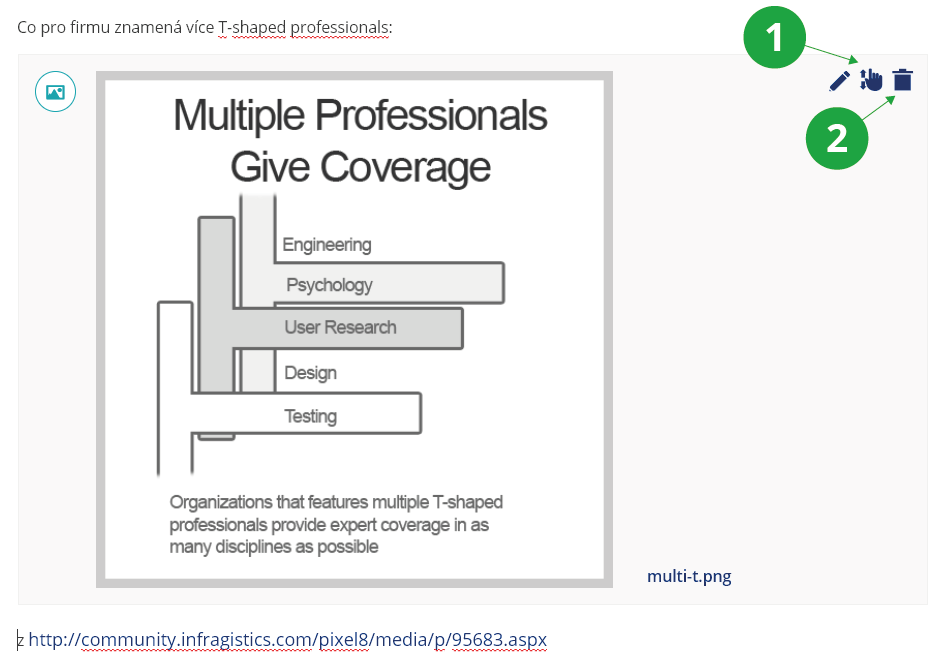
1 Move an element in the syllabus.
2 Delete an element in the syllabus.
- 6.Making the syllabus available to students
For a typical use in the current course, the syllabus does not need to have the access rights changed because it is implicitly accessible to students of the course. If for some reason it is desirable to limit or extend this right, you can use the "Rights - Setting" option (in the interactive syllabus menu). You will be presented with a dialog for setting the rights of the interactive syllabus file, in which you can change the rights in the desired way. In the case of extending rights, remember that all parent folders in the Study Materials of the course needs to also have the desired read right.

1 Menu of interactive sylabus operations.
2 Options for setting rights to the interactive syllabus.
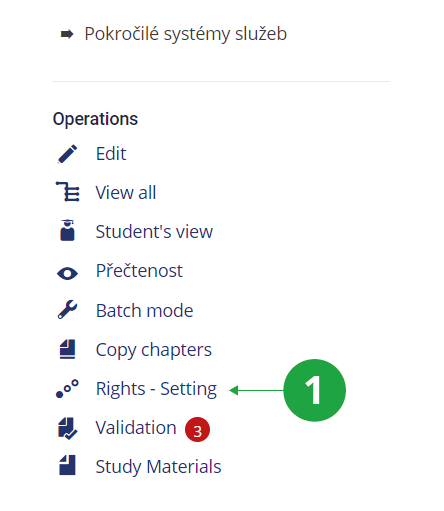
1 For options for setting rights to the interactive syllabus, see the operations menu when you view it.
If the syllabus is accessible to students (students of the course immediately after the syllabus is created), they can see it in their interface
The Information System Student [course]a link that they can use to open it. If you want to make the syllabus available to someone else, you need to set the rights of the file to open the syllabus (.qwarp), including the folder where the file is located, as described above. The syllabus can then be opened by clicking on this file in the course study materials.
- 7.I have made my interactive syllabus accessible to my students, but they keep complaining of not being able to expand it (get it displayed). What might be the problem?
- Please make sure you have set its access rights correctly.
- You can do so by clicking on the Access rights reference situated at the top of your syllabus. Make sure the rights are set the way that allows your students to access the syllabus. If they are not, change the settings.
- Similarly, you should also check the rights of the Study materials folder housing the file containing a reference to your syllabus. If the students are not allowed to access this folder, they cannot access the file, and thus the syllabus, either.
- Are you really sure you have made all your chapters public?
When editing the syllabus, check that there is no lock icon for each chapter, if so, click on “chapter settings” (pencil icon after moving to the chapter line) and set to “publish now”.
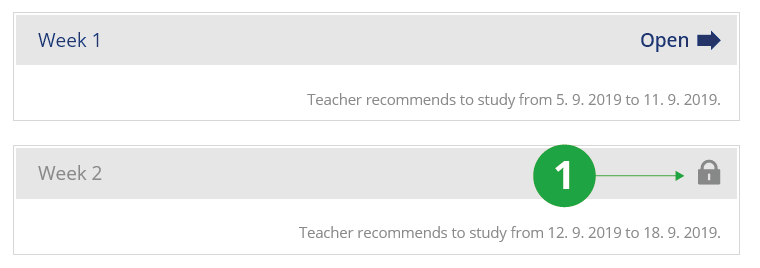
1 Locked chapter in the interactive syllabus.
- Please make sure you have set its access rights correctly.
- 8.What structure is the syllabus expected to have?This is completely up to you. An interactive syllabus may have, for instance, one of the following forms:
- a syllabus containing as many chapters as there are weeks in the term (one chapter for each week)
- a syllabus containing as many chapters as there are topics you want to deal with during the term
- multiple syllabi (one for each seminar group)
- a syllabus containing multiple chapters – some for lectures, some for seminars
- a syllabus containing general course-related information and its chapters with seminar group-specific information
- 9.Introductory text and opening image
Provided you wish to notify your students of organization of your course, you might use the introductory text. Shown at the beginning of the interactive syllaus and contains some introductory and other important information pertinent to your course such as teachers' e-mail addresses, their office hours, completion pre-requisites, etc. You can fill in the introductory text in:The Information System Teacher [select a course] Interactive syllabi Edit Edit (pencil icon at the top right of the banner with the interactive syllabus name)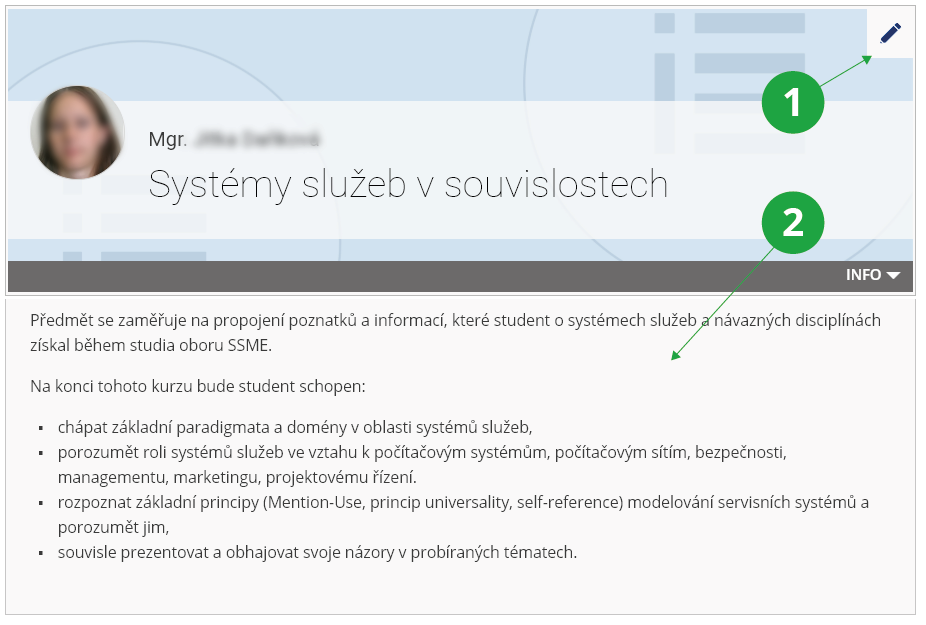
1 After reaching the right corner of the banner with the interactive syllabus name, you will be able to edit the basic information about the sylabus: the name, the opening image, the person displayed and the introductory text.
2 View the introductory text.
The ideal parameters of your own image are:
- minimum size 1200x450 px, but for best results 1600x620 px, larger is not recommended;
- the ideal format is JPG;
- the ideal file size is 200 KB, then it will load quickly, the maximum file size is 1 MB.
- 10.Displaying Your SyllabusIt is advisable to always get the application to display sub-syllabi during the weeks (periods) they relate to. To specify when a certain sub-syllabus should be made public, please click on 'Specify when to make public'. You might also want to use the option of Batch mode to do so for several chapters at a time.

1 Setting the recommended interval for chapter study.
- 11.Where can I find images and other files that were inserted directly in the syllabus?
The materials displayed in the interactive syllabus, i.e. images, PDFs, videos, etc., can either be uploaded somewhere in the study materials of the course and linked from there, or they can be saved directly into the interactive syllabus.
The interactive syllabus file and the content inserted into it is stored in the course study materials. It is located in the root Study Materials agenda folder and always has the extension QWARP, for example, index.qwarp.
When you hover over the syllabus file icon, the option to open the nested syllabus folder appears. This is where you will find all the files that have been inserted into the interactive syllabus directly by uploading from your own device, for example by dragging and dropping.
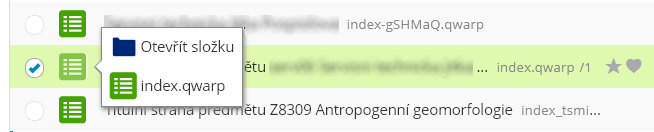
1 When you hover over the interactive syllabus icon in the file manager, you will see the nested folder that has been created specifically for the syllabus. This is where the files that are dragged and dropped or directly uploaded to the syllabus are stored.
This folder can also be accessed directly from the interactive syllabus via the "Embedded files" option located in the "Operations" column.

1 Link to the folder with files inserted into the interactive syllabus.
- 12.Creating (Another) Interactive Syllabus Anywhere in ISClicking on the reference “Create a new interactive syllabus”, you can create one syllabus for a course (or lecture) and one for each of its seminar groups. Provided you need yet another syllabus, you can create it using the following path:The Information System E-learning Course-unrelated Interactive syllabi Create a new interactive syllabusYou will be asked to provide a name for the file containing the syllabus, the folder in which the file should be stored, and information on how the syllabus should be structured. This option therefore allows you to create another syllabus in, for instance, the Document Server or Depository sections.
- 13.What is the validation of the interactive syllabus?
Validation verifies the functionality of all elements in the interactive syllabus. Problems found are marked in red. Situations that may be problematic are highlighted in orange. The validation is located in the list of operations with the interactive syllabus.
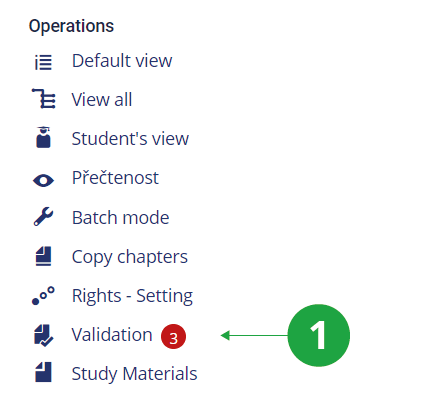
1 If problems are found in the interactive curriculum, an indication is displayed next to the "Validation" operation.
- 14.How do I verify that students are using the interactive syllabus?
The "Read rate" feature is used to verify that students are looking at the interactive syllabus. This function is located in the list of operations with the interactive syllabus. Read rate contains a summary table with a list of students and the readership rate is expressed as a percentage.
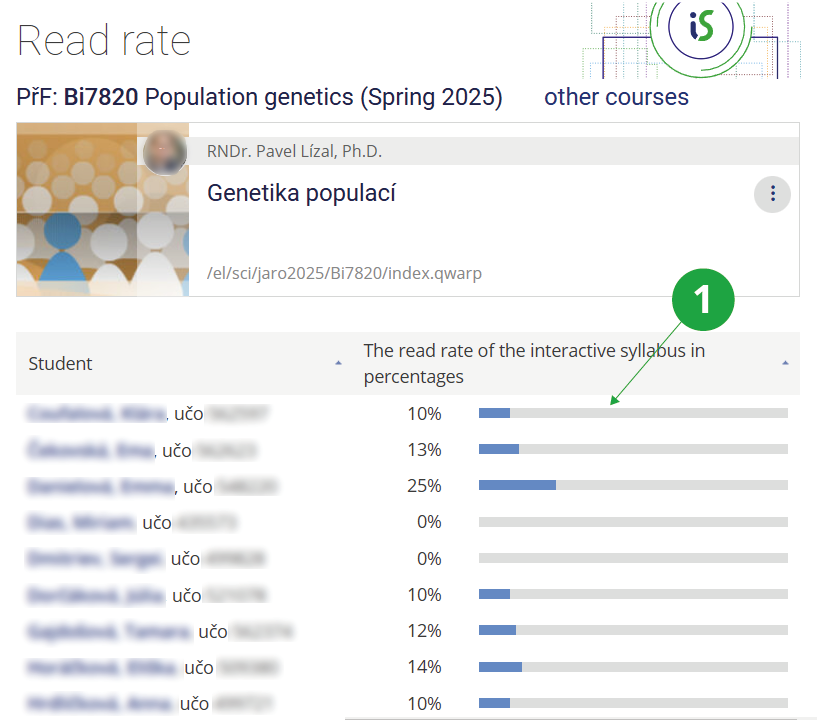
1 The "Read Rate" function shows how far students are in going through the interactive syllabus.
The "Study progress" indicator in the interactive syllabus recalculates how far along a student is in reading and completing the interactive syllabus. It counts viewing chapters, running videos, opening linked files, etc. The student can also easily see where they left off in their study of the material.
Provided you have failed to find the information you were searching for, you can contact us at  fi
fi municz